5 Fun Food Crafts to Make with Kids
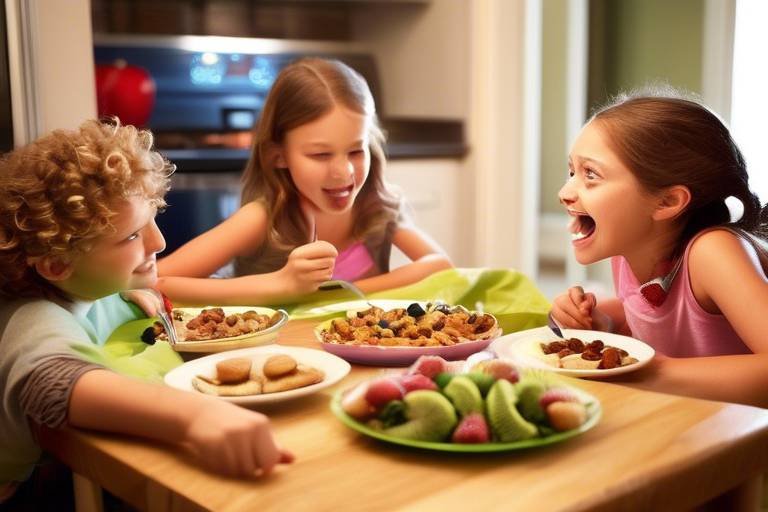
Are you ready to dive into a world of creativity and deliciousness? Engaging kids in the kitchen can be an absolute blast, and what better way to do it than through fun food crafts? These activities not only spark creativity but also teach kids valuable lessons about teamwork, nutrition, and the joy of cooking. Imagine the laughter and excitement as they transform ordinary ingredients into edible masterpieces! In this article, we’ll explore five delightful food crafts that will keep your little ones entertained and inspired. So, roll up your sleeves and let’s get cooking!
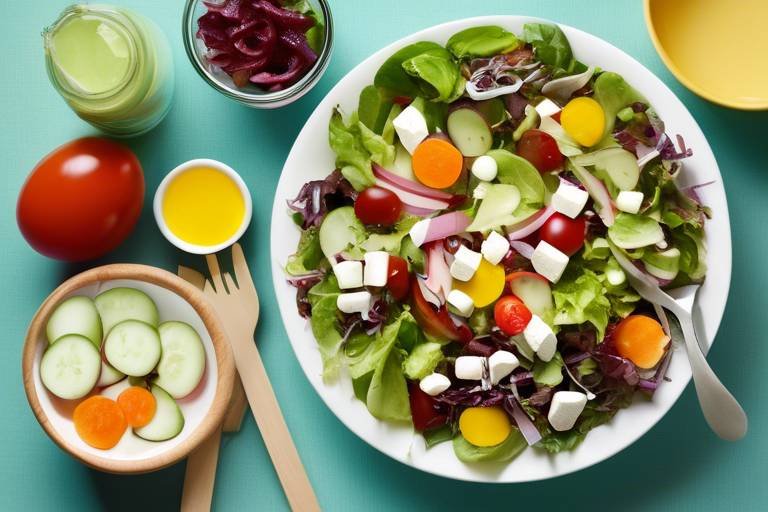
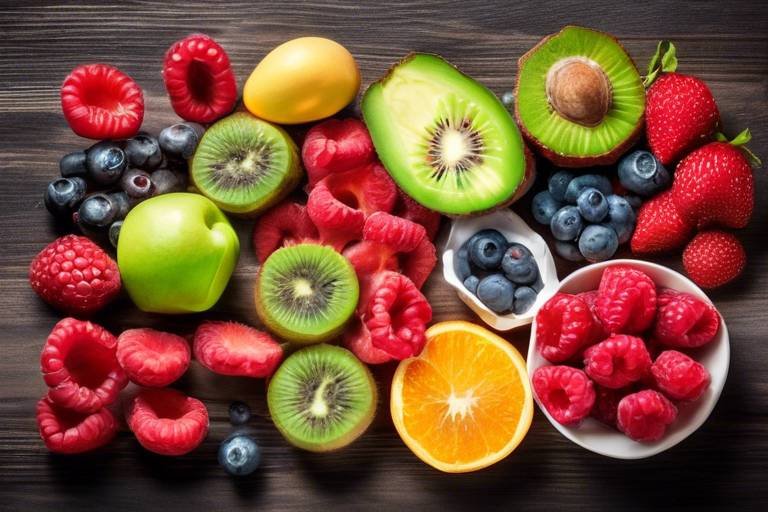
Let’s kick things off with a vibrant splash of color! Fruit and Veggie Art is a fantastic way to turn healthy eating into a fun and engaging activity. Picture this: your child slicing up colorful fruits like strawberries, kiwis, and bananas, and arranging them into beautiful shapes and designs. Not only does this promote creativity, but it also introduces them to the importance of incorporating fresh produce into their diets. You can even create a mini gallery in your kitchen, showcasing their edible art pieces. Talk about a masterpiece that’s good enough to eat!
Who says you can’t wear your snacks? With Edible Jewelry, kids can create delicious accessories that are as fun to make as they are to eat! Using items like cereal, gummy candies, and pretzels, children can string together their favorite snacks to create unique bracelets and necklaces. This activity not only enhances their fine motor skills but also allows them to express their personal style. Imagine the joy on their faces as they proudly show off their tasty creations to family and friends. Plus, it’s a great way to sneak in some conversation about healthy snacking!
Who doesn’t love cookies? Cookie Decorating is the perfect opportunity for kids to unleash their inner artists. Start by baking a batch of cookies (or buying some if you’re short on time), and set up a decorating station with various toppings like icing, sprinkles, and edible markers. As they dive into this sweet activity, they'll not only enhance their creativity but also get a rewarding treat at the end. Each cookie becomes a canvas, and the best part? They get to eat their delicious artwork! What could be better than that?
Time to don those chef hats! With DIY Pizza Creations, kids can take charge of their culinary adventure by designing their own pizzas. Provide a variety of toppings—think pepperoni, bell peppers, olives, and cheese—and let them create their own unique flavor combinations. This hands-on activity teaches decision-making and encourages creativity while also emphasizing the joy of cooking together. As the aroma of freshly baked pizza fills the kitchen, you’ll enjoy quality family time and a delicious meal that everyone helped create.
Who can resist the allure of chocolate? Chocolate-Covered Treats are a surefire way to get kids excited about cooking. Set up a dipping station with melted chocolate and an array of dippable goodies like fruits, pretzels, and marshmallows. Kids will love experimenting with different combinations of flavors and textures, and the best part is that they get to indulge in their delightful creations afterward. It’s a sweet adventure that combines creativity and a little bit of science, as they learn about melting and cooling chocolate!
- What age is appropriate for these food crafts?
These activities are suitable for children ages 4 and up, depending on their skills and supervision needed.
- Do I need special ingredients?
Nope! Most of the ingredients are common household items or easily found at your local grocery store.
- Can these activities be done indoors?
Absolutely! These fun food crafts are perfect for indoor activities, especially on rainy days.
- How can I make these activities healthier?
Incorporate more fruits and veggies and use whole grain options when available!

Fruit and Veggie Art
Transforming ordinary fruits and vegetables into vibrant art pieces is not just a fun activity—it's a fantastic way to ignite your child's creativity while teaching them about healthy eating habits. Imagine a plate filled with colorful creations that look too good to eat! This engaging craft allows kids to explore their artistic side using nature's palette, all while learning the importance of incorporating fresh produce into their diets.
To get started, gather a variety of fruits and vegetables. Think outside the box! You can use anything from apples and bananas to bell peppers and cucumbers. The beauty of this craft lies in the endless possibilities. Encourage your little ones to use their imagination and create animals, faces, or even abstract patterns. For example, a round orange can become the sun, while slices of cucumber can serve as rays. The only limit is their imagination!
Here’s a simple way to organize a Fruit and Veggie Art session:
| Materials Needed | Ideas for Art |
|---|---|
| Fruits: apples, bananas, oranges, grapes | Animal shapes, faces, or flowers |
| Vegetables: cucumbers, carrots, bell peppers | Abstract designs or landscape scenes |
| Toothpicks and skewers | Building structures or kabobs |
As they create, take the opportunity to discuss the nutritional benefits of each item. For instance, did you know that carrots are great for your eyesight? Or that bananas provide a quick energy boost? This dialogue not only enhances their understanding of food but also encourages them to appreciate healthy choices. Plus, you might find that they are more willing to try new fruits and veggies after having so much fun with them!
Once the artwork is complete, consider making it a family affair. Set up a mini exhibition at home where everyone can showcase their masterpieces. It’s a delightful way to celebrate their creativity and, of course, to enjoy a healthy snack afterward. You can even take pictures of their creations before they dig in—after all, you want to remember those edible masterpieces!
In conclusion, Fruit and Veggie Art is more than just a craft; it’s an opportunity to bond, learn, and have fun in the kitchen. So gather your supplies, unleash your creativity, and watch as your children transform simple ingredients into extraordinary works of art!
- What age is appropriate for Fruit and Veggie Art? This activity is suitable for children of all ages, but younger kids may need assistance with cutting and handling sharp objects.
- Can I use canned or frozen fruits and vegetables? While fresh produce is ideal for this craft, you can use canned or frozen options as long as they are safe for your child to handle.
- How can I encourage my child to eat what they create? Make it a fun challenge! After creating their art, encourage them to taste different pieces and discuss their favorites.

Edible Jewelry
Imagine a world where your jewelry is not just a fashion statement but also a tasty treat! is a delightful way to engage your kids in the kitchen while letting their creativity shine. This fun activity combines the joy of crafting with the deliciousness of snacks, making it a win-win for both parents and children. You can create beautiful, wearable accessories using a variety of snacks that are not only fun to make but also fun to eat!
To get started, gather some simple ingredients that you probably already have at home. Think of cereal, gummy candies, pretzels, and even popcorn. These items are perfect for stringing together into necklaces or bracelets. The process is straightforward and allows kids to express their unique styles. Plus, it’s a great opportunity to discuss the importance of balance in their diets while they enjoy their creations.
Here’s a basic overview of how to create your own edible jewelry:
- Gather Your Supplies: You’ll need some string or elastic, scissors, and your choice of edible items.
- Prepare the Edibles: If using cereal or pretzels, ensure they are easy to thread. For gummy candies, you might want to cut them into smaller pieces.
- Get Creative: Let the kids choose their favorite colors and flavors. They can alternate between different snacks to create patterns or designs that reflect their personalities.
- String Away! Help them thread their chosen snacks onto the string, tying knots at the ends to secure their masterpiece.
One of the best parts about making edible jewelry is that it encourages kids to experiment with flavors and textures. They can create a rainbow bracelet using fruity cereals, or perhaps a salty-sweet necklace with pretzels and chocolate-covered candies. The possibilities are endless! Not only does this craft allow for creativity, but it also enhances fine motor skills as they practice threading the snacks onto the string.
Once the edible jewelry is complete, it’s time to show it off! Kids will love wearing their creations, and you can even have a mini fashion show in your living room. This activity is not just about making food; it’s about making memories. Sharing laughs and enjoying the fruits of their labor can turn a simple afternoon into a cherished experience.
Now, let’s not forget the cleanup! It’s important to involve kids in this part too. Teaching them to clean up after their crafts not only instills responsibility but also reinforces the idea that fun can come with a little work. After all, the joy of creating edible jewelry is best enjoyed when the space is tidy and ready for the next adventure!
In conclusion, edible jewelry is more than just a fun craft; it’s an opportunity for kids to learn about food, express their creativity, and enjoy a tasty treat they made themselves. So, grab those snacks and let the crafting begin!
1. What types of snacks work best for edible jewelry?
Snacks like cereal, gummy candies, pretzels, and popcorn are great options. They are easy to thread and come in a variety of colors and flavors!
2. Can I use chocolate or other sticky items?
While chocolate can be used, it might not hold up well as a jewelry piece unless it's set properly. Consider using chocolate-covered pretzels or candies for added fun!
3. Is this activity safe for younger children?
Yes! Just ensure that small items are supervised to prevent choking hazards. Always use age-appropriate snacks and materials.
4. How can I make this activity educational?
Discuss the nutritional aspects of the snacks used, talk about colors and patterns, or even explore cultural jewelry traditions while crafting!

Cookie Decorating
Cookie decorating is not just a fun activity; it's a delightful creative outlet that allows kids to express themselves while indulging in a sweet treat. Imagine a kitchen filled with laughter, the aroma of freshly baked cookies wafting through the air, and the sight of colorful icing and sprinkles ready to be transformed into edible masterpieces! This activity is perfect for rainy days, birthday parties, or simply as a weekend project that brings the family together.
To get started, you'll need some basic supplies. Gather your favorite cookie recipes or even store-bought cookies, various colors of icing, sprinkles, edible markers, and any other fun toppings you can think of. The beauty of cookie decorating lies in its flexibility; you can choose to create festive designs for holidays, whimsical characters, or even abstract art. The sky's the limit!
As you set up your decorating station, consider laying out all the supplies in an organized manner. This not only makes it easier for the kids to find what they need but also teaches them a bit about organization and planning. Encourage them to brainstorm their designs before they start. You might say, “What do you want your cookie to look like? A rainbow? A monster? Or maybe a favorite animal?” This sparks their imagination and makes the process even more exciting.
Once the cookies are ready for decorating, let the fun begin! Kids can use piping bags for icing, which helps develop their fine motor skills. If you don’t have piping bags, simple zip-lock bags with a corner snipped off work just as well. As they decorate, guide them to think about color combinations and patterns. You can even set challenges, like “Can you create a cookie that looks like a flower?” or “How about a cookie that represents your favorite movie character?”
After the cookies are decorated, it's time for the best part—enjoying their creations! You can have a mini taste test where everyone shares their cookies and explains their design choices. This not only fosters a sense of pride in their work but also encourages them to appreciate each other’s creativity. Plus, it’s a great opportunity to discuss flavors and textures, enhancing their understanding of food.
Finally, let’s not forget about the clean-up process. Involving kids in cleaning up after the fun is just as important as the decorating itself. It teaches responsibility and the importance of teamwork in the kitchen. You might turn it into a game by timing how fast everyone can put away the supplies!
In summary, cookie decorating is more than just a fun activity; it’s a blend of creativity, learning, and deliciousness. So, roll up your sleeves, grab those cookies, and let the decorating adventure begin!
- What type of cookies are best for decorating?
Soft, thick cookies like sugar cookies or gingerbread are ideal as they hold their shape well and provide a sturdy base for icing. - Can I use store-bought icing?
Absolutely! Store-bought icing can save time and is often easier for kids to use. Just make sure to have various colors available for more creative options. - How can I store decorated cookies?
Once decorated, store cookies in an airtight container at room temperature. If you’ve used a lot of icing, consider placing parchment paper between layers to prevent sticking.

DIY Pizza Creations
There's something magical about the aroma of fresh pizza wafting through the kitchen, and when kids get involved in making their own, it becomes an unforgettable experience! are not just about throwing toppings on dough; they are a fantastic way to spark creativity, foster independence, and teach essential cooking skills. Imagine a kitchen filled with laughter and excitement as little hands roll out dough, spread sauce, and sprinkle toppings like a pro chef!
First things first, you'll want to gather your ingredients. This is where the fun begins! You can use store-bought pizza dough or make your own from scratch, which is an excellent opportunity to teach kids about measuring and mixing. Once you have your base, set up a colorful array of toppings. Think of it as an artist's palette, but instead of paint, you have:
- Tomato sauce
- Cheese (mozzarella, cheddar, or even vegan options)
- Vegetables (bell peppers, onions, mushrooms, olives)
- Proteins (pepperoni, sausage, chicken, or plant-based alternatives)
- Herbs and spices (oregano, basil, garlic powder)
Encourage your kids to get creative! They can design their pizzas in fun shapes or themes. For example, a smiley face pizza with olives for eyes and a pepperoni smile can be a delightful masterpiece! This not only allows them to express their culinary creativity but also enhances their decision-making skills as they choose which ingredients to combine.
As the pizzas come together, it's a great time to chat about the ingredients. Discuss the different flavors and textures, and even the nutritional benefits of each topping. For instance, did you know that bell peppers are rich in vitamin C? This can turn into a mini science lesson while you're cooking!
Once the pizzas are assembled, it's time for the best part: baking! Preheat your oven, pop the pizzas in, and let the magic happen. The anticipation builds as they wait for the cheese to melt and the crust to turn golden brown. You can even create a little countdown timer to make it more exciting!
When the pizzas are finally ready, gather around the table for a family feast. Each child can present their creation, and you can even have a little 'pizza tasting' contest where everyone votes for their favorite design and flavor combination. This not only makes the meal more engaging but also encourages kids to appreciate each other's work.
In the end, DIY pizza creations are more than just a meal; they are a way to bond, learn, and create lasting memories in the kitchen. So roll up your sleeves, unleash your inner chef, and let the pizza party begin!
Q: Can I use pre-made pizza bases?
A: Absolutely! Pre-made bases are a great time-saver and allow for more focus on creativity with toppings.
Q: What if my kids are picky eaters?
A: Encourage them to try new toppings by making it a fun challenge. They might surprise you with what they like!
Q: How can I make this activity educational?
A: Involve them in measuring ingredients, discussing nutrition, and even exploring different cuisines by trying various toppings from around the world.
Q: Can we make dessert pizzas?
A: Definitely! Use a cookie dough base and top it with fruits, chocolate, and whipped cream for a sweet treat!

Chocolate-Covered Treats
Who doesn't love the sweet, rich taste of chocolate? When you combine that with the joy of crafting delicious treats, you have a recipe for fun! Making with kids is not only a delightful way to spend time together, but it also sparks creativity and experimentation in the kitchen. Imagine the excitement on their faces as they dip their favorite snacks into a warm, gooey pool of melted chocolate. It's like a mini adventure in every bite!
To get started, gather a variety of snacks to dip in chocolate. Some popular options include:
- Fruits: strawberries, bananas, and apples
- Snacks: pretzels, marshmallows, and graham crackers
- Nuts: almonds, cashews, and walnuts
Once you've chosen your ingredients, it's time to melt the chocolate. You can use a microwave or a double boiler for this. Just make sure to keep a close eye on the chocolate to prevent it from burning. When it's nice and smooth, let the fun begin! Give each child their own plate or bowl of melted chocolate and let them dip their chosen snacks.
But wait, there's more! After dipping, the real creativity comes into play. Set up a decorating station with various toppings. Think sprinkles, crushed nuts, coconut flakes, or even edible glitter. Kids can sprinkle these toppings on their chocolate-covered treats, turning them into unique masterpieces. This not only enhances the visual appeal but also adds exciting textures and flavors!
As the chocolate-covered treats cool and harden, you can talk about the science behind chocolate. Did you know that chocolate comes from cacao beans? It's fascinating to share how it transforms from bean to bar, and then into the delicious treat they’re creating. This conversation can lead to discussions about healthy eating, moderation, and even the importance of cooking together as a family.
Once everything is set, gather around and enjoy the fruits of your labor. You can even make it a little competition by voting on the most creative treat. This not only encourages kids to express their individuality but also fosters a sense of teamwork and collaboration. Plus, who doesn’t love a bit of friendly competition?
In the end, are more than just a tasty snack; they offer a wonderful opportunity for kids to learn, create, and bond with family. So, roll up those sleeves, grab that chocolate, and let the fun begin!
Q: Can we use white chocolate instead of dark chocolate?
A: Absolutely! White chocolate adds a different flavor and can be just as fun to work with. You can even mix different types of chocolate for a marbled effect!
Q: How can we store leftover chocolate-covered treats?
A: Store them in an airtight container in the refrigerator. Just make sure they are completely cooled and hardened before placing them in the container.
Q: What if we don't have chocolate chips?
A: You can use chocolate bars broken into pieces or even chocolate melts, which are specifically designed for melting and dipping!
Q: Can we make this a healthier option?
A: Yes! You can use dark chocolate for a healthier alternative and opt for fruits and nuts instead of sugary snacks. It's all about balance!

Veggie Garden Craft
Creating a mini veggie garden with your kids is not just a fun activity; it’s an exciting journey into the world of gardening! Imagine the thrill on their faces as they dig into the soil, plant seeds, and watch their little garden flourish. This craft allows children to connect with nature while learning about the importance of healthy eating and the environment.
To get started, gather some edible materials like cucumbers, tomatoes, bell peppers, and even herbs like basil or parsley. Not only do these ingredients make for a colorful garden, but they also serve as a delicious reward once the project is complete! You can use small pots, containers, or even a patch of soil in your backyard. The beauty of this craft is that it can be tailored to fit your space and resources.
As you embark on this gardening adventure, you can educate your kids about the different growth stages of plants. Explain how seeds sprout, grow roots, and eventually produce vegetables. It’s like watching a magical transformation unfold right before their eyes! Encourage them to take notes on their plants' progress, which can also enhance their writing skills.
Here’s a simple step-by-step guide to setting up your veggie garden:
- Choose Your Containers: Select pots or a garden bed that is suitable for the vegetables you want to grow.
- Prepare the Soil: Use nutrient-rich soil to ensure your plants have the best chance of thriving.
- Plant the Seeds: Let your kids plant seeds or seedlings, allowing them to choose their favorite vegetables.
- Water and Care: Teach them the importance of watering their plants regularly and caring for them as they grow.
- Harvest Time: Once the veggies are ready, enjoy a harvest party where everyone can taste the fruits of their labor!
This craft not only teaches kids about gardening but also promotes teamwork and responsibility. They’ll learn that taking care of plants requires patience and dedication, which are valuable life skills. Plus, when they finally get to eat the veggies they’ve grown, the sense of accomplishment will be immense!
To make the experience even more engaging, consider creating a “Garden Journal” where kids can document their gardening journey. They can draw pictures of their plants, write down their observations, and even track the growth of their vegetables. This adds an educational twist to the fun and reinforces their learning.
In conclusion, the Veggie Garden Craft is a fantastic way to bring children closer to nature, teach them about healthy eating, and instill a sense of responsibility. So, grab your gardening tools, put on your gloves, and let the adventure begin!
- What vegetables are best for kids to grow? Easy-to-grow vegetables like radishes, lettuce, and cherry tomatoes are great choices for kids.
- How much space do we need for a mini veggie garden? You can start with just a few pots on a balcony or a small patch in your backyard.
- Can we grow vegetables indoors? Yes, many herbs and small vegetables can thrive indoors with proper light and care.

Homemade Ice Cream
Making is not just a fun activity, but it's also a fantastic way to teach kids about measurements, ingredients, and the science behind freezing. Imagine the excitement on your child's face as they mix, churn, and ultimately taste the delicious creation they made with their own hands! This activity is perfect for hot summer days or any time you want to indulge in a cool, creamy treat.
The process is surprisingly simple and can be done with just a few ingredients that you probably already have in your kitchen. You can choose to make classic flavors like vanilla or chocolate, or get adventurous and mix in fruits, candies, or even cookies! Here's a basic recipe to get you started:
| Ingredients | Quantity |
|---|---|
| Heavy Cream | 2 cups |
| Whole Milk | 1 cup |
| Granulated Sugar | 3/4 cup |
| Vanilla Extract | 1 tablespoon |
To make the ice cream, simply combine all the ingredients in a large bowl. Whisk them together until the sugar is fully dissolved. This is a great moment for kids to get involved—let them take turns whisking and watching the mixture come together! Once mixed, pour the combination into an ice cream maker and churn according to the manufacturer's instructions. If you don't have an ice cream maker, no worries! You can pour the mixture into a shallow dish and place it in the freezer. Every 30 minutes, stir it with a fork to break up any ice crystals until it reaches the desired consistency.
As you’re creating your homemade ice cream, encourage your kids to think about different flavors and mix-ins they might want to add. Perhaps they’d like to toss in some chocolate chips, fresh strawberries, or even a swirl of caramel. This is where their creativity can really shine! The beauty of making ice cream at home is that they can experiment and create a flavor that's uniquely theirs.
Once the ice cream is ready, it’s time for the best part—tasting! Serve it in bowls or cones and let the kids decorate their creations with toppings like sprinkles, whipped cream, or even more fruit. This not only makes the experience more enjoyable but also allows them to showcase their artistic flair.
In addition to being a fun kitchen project, making ice cream together creates lasting memories. It's a wonderful opportunity for parents and kids to bond and share laughter over spilled ingredients or the inevitable ice cream taste test. So, roll up your sleeves, gather your ingredients, and get ready for a delightful day of homemade ice cream!
- Can I make ice cream without an ice cream maker? Yes! Just follow the method of stirring the mixture every 30 minutes as it freezes.
- How long does homemade ice cream last? Homemade ice cream is best enjoyed within a week, but it can last up to two weeks if stored properly in an airtight container.
- What other flavors can I try? The possibilities are endless! Consider experimenting with mint chocolate chip, cookies and cream, or even tropical flavors like mango or coconut.

Yummy Sandwich Shapes
Who said sandwiches have to be boring? is a delightful way to turn a simple meal into a fun and engaging activity for kids. Imagine transforming a plain peanut butter and jelly sandwich into a star, heart, or even a dinosaur! Not only does this make lunchtime more exciting, but it also encourages children to explore their creativity and try new ingredients.
To get started, all you need are some cookie cutters in various shapes and sizes, along with your favorite sandwich fillings. The process is simple yet rewarding: just make your sandwiches as you normally would, then use the cookie cutters to create fun shapes. It’s like crafting, but with food! This activity not only makes the sandwiches visually appealing but also encourages kids to eat more by making their meals look enticing.
Here’s a quick tip: try using different types of bread, such as whole grain, white, or even wraps, to add variety. You can also experiment with fillings like turkey and cheese, hummus and veggies, or even nut butter and banana. The combinations are endless! As kids cut out the shapes, they can also learn about different ingredients and their nutritional benefits, making it both a fun and educational experience.
But wait, there’s more! To add an extra layer of fun, consider creating a “sandwich station” where kids can choose their own fillings and toppings. Set up a table with various ingredients, such as:
- Different types of bread
- Cheese slices
- Meats like ham, turkey, or chicken
- Veggies such as lettuce, cucumbers, and tomatoes
- Spreads like mayonnaise, mustard, or hummus
This way, kids can customize their sandwiches to their liking while also learning about making healthy choices. Once they’ve created their masterpieces, you can even have a “sandwich art show” where everyone showcases their creations before digging in! Not only does this foster creativity, but it also encourages teamwork and communication among kids.
In addition to being fun, making promotes fine motor skills as kids use cookie cutters and assemble their sandwiches. It’s a simple yet effective way to engage children in the kitchen while teaching them about food, nutrition, and the joy of cooking. So, the next time you’re preparing lunch, why not turn it into a fun crafting session? Your kids will love it, and you might just find yourself enjoying lunch a little more too!
1. Can I use any type of bread for sandwich shapes?
Absolutely! You can use any type of bread, including whole grain, white, or even wraps. Each type offers a different taste and texture.
2. What fillings are best for kids?
Kids usually enjoy familiar flavors, so popular choices include peanut butter and jelly, turkey and cheese, or hummus with veggies. Feel free to get creative!
3. How can I encourage my kids to try new ingredients?
Make it a fun challenge! Set up a sandwich station with various ingredients and encourage them to create their own combinations. You can even have a taste test to see which new ingredient they like best!
4. Are there any dietary restrictions to consider?
Yes, always be mindful of allergies or dietary restrictions. Make sure to check for nut allergies, gluten sensitivities, or any other dietary needs before preparing the sandwiches.
5. Can I prepare these sandwiches in advance?
While it's best to enjoy them fresh, you can prepare the fillings in advance and assemble the sandwiches just before serving to keep them from getting soggy.

Fruit Kabobs
What’s more fun than playing with your food? are a delightful way to engage kids in a healthy and creative snack-making process. Imagine vibrant colors, juicy textures, and the thrill of assembling skewers filled with their favorite fruits! This activity not only promotes healthy eating but also enhances fine motor skills as children learn to thread fruit pieces onto sticks. Plus, it's a fantastic way for them to express their creativity.
To get started, gather a variety of fruits. You can use classics like strawberries, grapes, and pineapple, or mix it up with kiwi, melon, and even bananas. The options are endless! Here’s a simple table to help you choose fruits based on their colors, which not only makes the kabobs visually appealing but also introduces kids to the concept of eating a rainbow:
| Color | Fruit Options |
|---|---|
| Red | Strawberries, Raspberries, Watermelon |
| Yellow | Pineapple, Banana, Mango |
| Green | Kiwi, Green Grapes, Honeydew |
| Orange | Mandarins, Apricots, Cantaloupe |
| Blue/Purple | Blueberries, Blackberries, Purple Grapes |
Once you've selected your fruits, it's time to assemble! Provide your kids with wooden skewers or even reusable plastic ones. Encourage them to create patterns or even their own unique designs. For example, they might want to alternate between a strawberry and a banana or create a color gradient from red to yellow. The best part? They can eat their creations once they’re done!
To make the experience even more enjoyable, consider pairing the fruit kabobs with a dipping sauce. A simple yogurt dip or a drizzle of chocolate can elevate the flavors and make the kabobs even more enticing. You could even have a mini taste test to see which combinations are the most popular!
In conclusion, fruit kabobs are not just a snack; they are an interactive experience that brings joy, learning, and healthy eating together. So, roll up your sleeves, grab those skewers, and let the fruit fun begin!
Q: Can I use frozen fruits for kabobs?
A: While frozen fruits can be used, they may not hold their shape well when thawed. Fresh fruits are recommended for the best texture and flavor.
Q: Are there any allergy considerations?
A: Always check for allergies, especially with fruits like strawberries and melons. It's best to consult with parents before introducing new foods.
Q: How can I make the kabobs more nutritious?
A: You can add a protein element, such as cheese cubes or yogurt, to make the kabobs more balanced and filling.
Frequently Asked Questions
- What are some easy food crafts I can do with my kids?
There are plenty of easy food crafts you can try! Some popular options include Fruit and Veggie Art, where kids can create fun shapes using colorful produce, and Edible Jewelry, which lets them string together snacks like cereal and gummy candies. These activities are not only fun but also educational!
- How can food crafts help my child's development?
Food crafts are a fantastic way to promote fine motor skills and creativity in children. Activities like Cookie Decorating and DIY Pizza Creations encourage kids to make choices and express themselves artistically. Plus, they learn about healthy eating and teamwork as they work together in the kitchen!
- Are these food crafts safe for young children?
Absolutely! Most food crafts are safe for young children, especially when supervised by an adult. Just make sure to use age-appropriate tools and ingredients. For example, when making Chocolate-Covered Treats, ensure that the chocolate is melted and cooled down to avoid burns.
- What ingredients do I need for these crafts?
The ingredients vary depending on the craft. For Fruit Kabobs, you'll need a selection of fresh fruits, while Homemade Ice Cream requires milk, sugar, and flavorings. Most recipes are simple and use common kitchen ingredients, making them easy to gather!
- Can food crafts be educational as well as fun?
Definitely! Food crafts can be a great way to teach kids about nutrition, cooking techniques, and even math skills like measuring ingredients. For instance, when making Yummy Sandwich Shapes, kids can learn about different food groups and how to create balanced meals while having a blast!
- How do I clean up after a food craft session?
Cleaning up after a fun food craft is part of the experience! Start by clearing away any leftover food items and wiping down surfaces. Encourage kids to help with the cleanup to teach responsibility. A wet cloth and some soap usually do the trick for sticky messes!
- What age group are these food crafts suitable for?
These food crafts are suitable for a wide range of ages, from toddlers to preteens. Just adjust the complexity of the tasks based on the child's age. Younger kids may enjoy simpler crafts like Fruit Kabobs, while older kids can tackle more intricate projects like Cookie Decorating.


