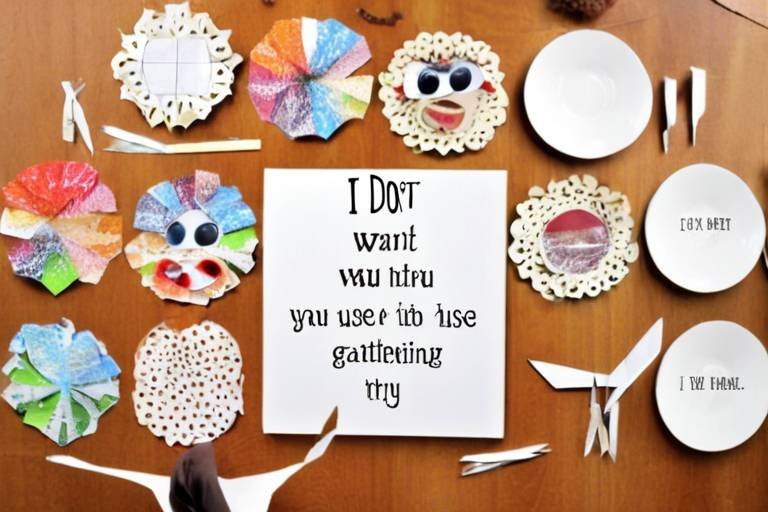
DIY Craft Ideas for a Family Day In
In today's fast-paced world, finding time to bond with family can sometimes feel like a challenge. However, a cozy day spent indoors can turn into an unforgettable experience filled with laughter, creativity, and connection. DIY crafts are the perfect way to bring everyone together, sparking imagination and fostering teamwork. Imagine the joy of creating something beautiful with your loved ones, all while making lasting memories. Whether you’re a seasoned crafter or a complete novice, there’s something for everyone in the world of DIY crafts. So, roll up your sleeves, gather your supplies, and let’s dive into some fantastic ideas that will transform your family day in!
Paper crafts are not only easy to set up but also incredibly versatile, making them ideal for families with children of all ages. You can find an endless array of paper types around your home, from old magazines to wrapping paper, each waiting to be transformed into something extraordinary. Encouraging imaginative expression through paper crafts allows family members to explore their artistic skills while sharing ideas and techniques. Some fun projects to consider include:
- Origami Animals: Fold colorful paper into delightful creatures that can come to life in your hands.
- Paper Collage: Cut out images and shapes from magazines to create a unique family masterpiece.
- Greeting Cards: Design personalized cards for upcoming birthdays or holidays, adding a personal touch to your messages.
These activities not only promote creativity but also provide a valuable opportunity for family members to bond over shared projects. Just imagine the satisfaction of displaying your collective artwork in your home!
Turning trash into treasure is not only fun but also a fantastic way to teach kids about sustainability. With a little creativity, everyday recyclable items can be transformed into unique crafts that are both engaging and eco-friendly. Gather materials such as plastic bottles, cardboard boxes, and old newspapers, and prepare for a crafting adventure!
Cardboard is one of the most versatile materials you can find around the house. With a few simple tools, the possibilities are endless! From sculptures to playhouses, cardboard can be shaped into anything your imagination desires.
Why not challenge your family to a cardboard architecture competition? Each member can design their own structure, whether it’s a tower, a house, or even a spaceship. This not only encourages teamwork but also allows each person to showcase their architectural skills. Consider using:
- Cardboard boxes
- Scissors
- Glue or tape
Watch as your living room transforms into a bustling construction site filled with laughter and creativity!
Cardboard can also serve as a fantastic canvas for artistic designs. Encourage family members to express their individuality by painting, cutting, and decorating their creations. Each piece can tell a story, showcasing each person's unique style. You might even end up with a mini-exhibition right in your home!
Engaging in the classic art of paper mache is a great way to enhance fine motor skills and creativity in kids. By layering strips of paper over a form (like a balloon or a cardboard structure), you can create imaginative sculptures and masks. This hands-on project is not only fun but also provides an opportunity for family members to collaborate on designs and themes.
Bringing the outdoors inside can spark creativity and foster a connection with nature. Incorporating elements like leaves, stones, and flowers into your crafts can lead to beautiful and unique creations. Plus, it’s a great excuse to go on a little nature walk before you start crafting!
Leaf printing is a simple yet effective way to introduce children to the beauty of nature-inspired design. By using paint and leaves, you can create stunning prints that capture the essence of the outdoors. It’s a fun way to explore color mixing and texture, and the results can be quite spectacular!
Rock painting is another delightful craft that allows family members to express their artistic talents. Gather some smooth stones and paint them with vibrant colors and designs. These decorative garden stones can add a personal touch to your outdoor space, and they make wonderful gifts for friends and family!
Celebrating the seasons with themed crafts is a wonderful way to create a festive atmosphere at home. Each season brings its own unique beauty and spirit, and crafting around these themes can enhance family traditions and celebrations.
Creating homemade decorations for various holidays is a fantastic way to encourage family participation in festive preparations. Whether it’s crafting ornaments for Christmas or making spooky decorations for Halloween, the possibilities are endless. Plus, it’s a great way to teach kids about the significance of each holiday!
Crafting seasonal wreaths using natural or artificial materials can be a fun and hands-on project. Not only do they enhance your home decor, but they also provide a beautiful way to celebrate the changing seasons. Imagine hanging a vibrant spring wreath filled with flowers or a cozy autumn wreath adorned with leaves on your front door!
Q: What materials do I need for these crafts?
A: Most of the materials can be found at home, such as paper, cardboard, scissors, paint, and recyclables. Check your recycling bin for inspiration!
Q: Are these crafts suitable for all ages?
A: Absolutely! Many crafts can be adapted to suit different age groups, making it a fun activity for the entire family.
Q: How long do these crafts typically take?
A: The time varies depending on the project, but most can be completed in a few hours, making them perfect for a family day in.

Creative Paper Crafts
When it comes to engaging in , the possibilities are virtually endless! Imagine a world where sheets of paper transform into vibrant creations that not only express your family's artistic flair but also strengthen your bonds. Whether you're using construction paper, old magazines, or even scrap paper, these projects are perfect for all ages. So, gather your supplies and let your imagination run wild!
One of the most delightful aspects of paper crafts is how they allow for imaginative expression. You can create anything from colorful collages to intricate origami figures. For example, why not start with a simple project like making paper flowers? All you need are some colorful papers, scissors, and glue. Just cut out petal shapes, layer them, and voilà! You've created a beautiful bouquet that never wilts. This is not just a fun activity; it’s a way to teach children about shapes and colors while sparking their creativity.
Another fantastic idea is to create a family scrapbook. This project can be a wonderful way to preserve memories while encouraging storytelling. Gather photos, ticket stubs, and other memorabilia, and let each family member contribute their own pages. You can even assign themes for each section, such as vacations, holidays, or special occasions. As you craft together, you’ll find that reminiscing about past experiences brings everyone closer.
For those looking to add a bit of flair, consider paper mache. It’s a classic technique that can be used to create unique sculptures, masks, or even decorative bowls. Using just newspaper, flour, and water, you can craft anything your heart desires. Not only does this project promote fine motor skills, but it also introduces kids to the concept of recycling, as they learn to repurpose old newspapers into something beautiful.
To make things even more exciting, why not set up a paper craft competition? Divide the family into teams and give them a theme or a specific type of paper craft to work on. Set a timer and let the creativity flow! Not only will this foster teamwork, but it will also ignite a friendly spirit of competition. At the end, have a little showcase where everyone presents their creations. You might be surprised by the talent that emerges!
In conclusion, engaging in creative paper crafts is not just about making things; it’s about creating memories, fostering creativity, and spending quality time together as a family. So, roll up your sleeves, grab those scissors, and let the fun begin!
| Question | Answer |
|---|---|
| What materials do I need for paper crafts? | You will need various types of paper (construction paper, old magazines), scissors, glue, and any additional decorative items like markers or stickers. |
| Are paper crafts suitable for all ages? | Absolutely! There are paper craft projects that can be adapted for toddlers, kids, and even adults. |
| Can paper crafts help with learning? | Yes! They can teach children about shapes, colors, and fine motor skills while also enhancing their creativity. |
| How can I store our paper crafts? | Consider using a scrapbook or a dedicated box to keep your creations safe and organized. |

Fun with Recyclables
Have you ever looked at a cardboard box and thought, "What can I do with this?" Well, let me tell you, the possibilities are endless! Engaging in crafts using recyclable materials not only sparks creativity but also promotes a sense of sustainability within the family. Imagine transforming a simple toilet paper roll into a charming owl or a plastic bottle into a vibrant flower pot. It’s like giving new life to items that would otherwise end up in the landfill. Plus, it’s a fantastic way to bond as a family while teaching valuable lessons about recycling and the environment.
One of the best parts about working with recyclables is that they are often free or low-cost, making it an accessible option for families on a budget. Gather up all those items you usually toss in the recycling bin and set up a crafting station at home. You’ll be amazed at what you can create together! Here are some ideas to get your creative juices flowing:
- Cardboard Creations: Use old boxes to build anything from castles to cars. Cut, fold, and paint to create a world of imaginative play.
- Plastic Bottle Planters: Transform plastic bottles into quirky planters for your indoor herbs or flowers.
- Egg Carton Animals: Turn egg cartons into adorable animals with just a little paint and some googly eyes.
As you embark on these projects, remember that the journey is just as important as the destination. Encourage everyone to share their ideas and collaborate on designs. This not only fosters creativity but also teaches teamwork. You might find that your children come up with ideas you never even considered!
Unleashing your creativity with cardboard is like opening a treasure chest of possibilities. You can craft anything from imaginative sculptures to elaborate playhouses that can provide hours of fun. The tactile experience of cutting, gluing, and assembling cardboard can be incredibly satisfying for both kids and adults alike. Plus, it’s a great way to recycle those delivery boxes that keep piling up!
When it comes to building impressive structures, the only limit is your imagination. Gather your family and brainstorm what you could create together. Whether it's a majestic castle, a cozy fort, or even a miniature city, working together to construct something from scratch can be a rewarding experience. You can even turn it into a friendly competition to see who can build the tallest or most creative structure!
Cardboard can also serve as an incredible canvas for artistic designs. Grab some paint, markers, or even craft paper, and let your family express their individuality. You can create themed decorations, personalized gifts, or even art pieces that reflect your family’s unique style. This not only encourages artistic expression but also allows for a wonderful conversation starter when guests visit your home.
Engaging in the classic art of paper mache is another fantastic way to use recyclables. With just some old newspapers, flour, and water, you can create imaginative sculptures and masks that not only enhance fine motor skills but also ignite creativity in kids. Imagine crafting a colorful dragon or a whimsical mask that can be used for dress-up or playtime. The process of layering paper mache can be messy but oh-so-fun, and the end results are always worth it!
So, gather your recyclables and get ready for a day of fun and creativity! Remember, the goal is to enjoy the process, learn something new, and make beautiful memories together as a family.
Q: What types of recyclable materials can we use for crafts?
A: You can use a variety of materials such as cardboard boxes, plastic bottles, egg cartons, tin cans, and paper products like newspapers and magazines. The more diverse, the better!
Q: Do we need special tools for these crafts?
A: Basic crafting supplies like scissors, glue, tape, and paint are usually sufficient. You can also use items like markers, stickers, and other embellishments to enhance your creations.
Q: How can we ensure our craft projects are safe for kids?
A: Always supervise children during craft time, especially when using scissors or other sharp tools. Make sure to use non-toxic materials and keep small items away from younger children to prevent choking hazards.

Cardboard Creations
Unleashing your creativity with cardboard can be one of the most rewarding and fun activities for the entire family. Just think about it: you have a material that’s not only versatile but also incredibly accessible. From old boxes lying in the garage to packaging materials from your latest online shopping spree, cardboard is everywhere! The beauty of cardboard crafting is that it allows you to create anything your imagination can conjure. Want to make a spaceship? A castle? Or perhaps a cozy little fort for your kids? The possibilities are truly endless!
One of the best parts about working with cardboard is the collaborative spirit it fosters among family members. Picture this: everyone gathers around a big table, armed with scissors, glue, and a pile of cardboard. The air is filled with laughter and excitement as ideas bounce around the room. “Let’s build a giant robot!” someone shouts, while another family member suggests creating a mini zoo. This is where teamwork shines, and everyone has a role to play. You can designate tasks, such as cutting, assembling, or decorating, ensuring that everyone feels involved and valued.
When it comes to building structures with cardboard, you can start with simple designs and gradually increase the complexity as you gain confidence. For example, you might want to begin with:
- Simple Boxes: Perfect for storage or as a base for more elaborate designs.
- Playhouses: Create a cozy space for your children to play, complete with windows and doors.
- Obstacle Courses: Construct tunnels and ramps for your kids to navigate through, promoting physical activity and fun.
As you dive deeper into your cardboard creations, don’t forget to think outside the box—literally! Use your cardboard as a canvas for artistic designs. This is where you can let your family’s individuality shine. Grab some paint, markers, or even scrap paper to decorate your cardboard masterpieces. You can create vibrant murals, whimsical characters, or even intricate patterns. This not only enhances the visual appeal of your creations but also serves as a fantastic way to express your family’s unique style.
Moreover, engaging in cardboard crafts can lead to fantastic learning opportunities. Kids can develop fine motor skills as they cut, fold, and assemble their projects. They’ll also learn about geometry and engineering principles while figuring out how to balance and stabilize their structures. It’s like a mini-education session wrapped in a fun family activity!
To help you get started, here’s a simple table that outlines some basic materials you might need for your cardboard creations:
| Materials | Uses |
|---|---|
| Cardboard Boxes | Base for structures |
| Glue | Assembly of parts |
| Scissors | Cutting shapes and sizes |
| Paint/Markers | Decorating the final product |
In conclusion, cardboard creations are not just a craft; they are a gateway to bonding, learning, and endless fun. So gather your family, collect your cardboard, and start building! Who knows? You might just create something extraordinary together.
Q: What age is appropriate for cardboard crafting?
A: Cardboard crafting is suitable for all ages! Younger children may need assistance with cutting, while older kids can take the lead on more complex projects.
Q: How can we ensure safety while crafting?
A: Always supervise children when using scissors or glue. It’s best to have adult supervision for cutting tasks.
Q: What other materials can we use with cardboard?
A: You can combine cardboard with items like paper, plastic bottles, and fabric scraps for more diverse creations.

Building Structures
Building structures with cardboard is not just a fun activity; it's an adventure that ignites the imagination of both kids and adults alike! Imagine transforming a simple cardboard box into a magnificent castle, a spaceship ready for intergalactic travel, or even a cozy little house for your toys. The beauty of cardboard lies in its versatility; with a few cuts, folds, and some creative thinking, the possibilities are endless. Plus, this activity encourages teamwork as family members come together to brainstorm ideas, design plans, and bring their creations to life.
To start your architectural journey, gather materials that you might already have at home. You'll need:
- Cardboard boxes (any size will do!)
- Scissors or a craft knife
- Glue or tape
- Markers, paints, or any decorative materials
Once you have your materials ready, you can brainstorm as a family what kind of structure you want to build. Here are a few engaging ideas to kickstart your creativity:
- **Castles**: Create towering castles with drawbridges and towers. Use smaller boxes to make turrets and decorate them with paint to give them a royal touch.
- **Playhouses**: Design a playhouse that your children can step into. Cut out windows and doors, and let them decorate the interior with their favorite drawings.
- **Vehicles**: Build cars, trains, or even airplanes. Add wheels made from bottle caps for a realistic touch!
As you construct your masterpiece, encourage each family member to contribute their ideas. This not only fosters creativity but also strengthens communication and collaboration skills. You might find that your children come up with the most imaginative solutions, turning your cardboard into something truly spectacular!
Don’t forget to take breaks during your building sessions. Use this time to reflect on your progress, adjust your plans, and share laughs. Once your structures are complete, consider holding a mini-exhibition where everyone can showcase their creations. This not only boosts confidence but also creates a sense of accomplishment and pride in everyone's hard work.
And remember, the goal here is not perfection but rather the joy of creating something together. So, let your imaginations run wild and enjoy every moment of this bonding experience!
Q: What other materials can I use for building structures besides cardboard?
A: You can use materials like paper towel rolls, egg cartons, plastic bottles, and even old newspapers. The key is to think creatively about what you have at home!
Q: How can I make my cardboard structures more durable?
A: To enhance durability, consider reinforcing joints with extra tape or glue, and use thicker cardboard whenever possible. You can also cover the structure with a layer of paper mache for added strength.
Q: What age is this activity suitable for?
A: This activity can be enjoyed by children of all ages! Younger kids may need more assistance with cutting and assembling, while older children can take on more complex designs independently.
Q: Can this activity be done outside?
A: Absolutely! Building structures outside can add an extra layer of fun. Just be mindful of the weather and consider using waterproof materials if it’s a rainy day.

Artistic Designs
When it comes to unleashing your creativity, cardboard is an incredibly versatile medium that can be transformed into stunning . Imagine a blank canvas waiting for your imagination to take flight! With just a few simple tools and materials, your family can turn ordinary cardboard into extraordinary works of art that reflect each person's unique style and personality.
To begin, gather some basic supplies such as scissors, glue, paints, and markers. You might also want to have some decorative items on hand, like glitter, washi tape, or fabric scraps. Now, think of the endless possibilities: you could create vibrant wall art, intricate sculptures, or even playful masks. The beauty of working with cardboard is that it invites experimentation—there are no strict rules, just your own artistic vision!
One fun idea is to create a cardboard collage. Start by cutting various shapes from your cardboard—circles, triangles, or even abstract forms. Then, paint them in bright colors or cover them with patterned paper. Once your pieces are ready, arrange them on a larger piece of cardboard or canvas, and glue them down to form a cohesive design. This activity not only sparks creativity but also encourages teamwork, as family members can collaborate on the layout and color choices.
For those who enjoy a bit of a challenge, consider crafting 3D sculptures from cardboard. You can build anything from animals to architectural wonders! Start by sketching your design on paper, and then use your cardboard to bring it to life. Cut out the necessary pieces and assemble them using glue or tape. This hands-on project not only enhances fine motor skills but also provides a fantastic opportunity for family members to brainstorm and share ideas. Plus, when the project is complete, you’ll have a unique piece of art to display proudly in your home!
As you dive into your artistic cardboard creations, remember that the process is just as important as the final product. Encourage each family member to express their individuality through their designs. You might even consider hosting a mini art exhibit at home where everyone can showcase their creations. This not only fosters a sense of accomplishment but also strengthens family bonds through shared experiences.
In addition to individual projects, why not explore themed art sessions? Choose a theme—like nature, space, or favorite animals—and create designs that fit within that concept. This can lead to a fun and engaging discussion about art, creativity, and even personal interests. Plus, it’s a great way to introduce kids to various artistic styles and techniques.
Ultimately, the goal is to have fun and enjoy the creative process together as a family. So, grab those cardboard boxes, unleash your imagination, and watch as your living room transforms into an art studio filled with laughter, creativity, and unforgettable memories!
- What materials do I need for cardboard artistic designs? You will need cardboard, scissors, glue, paints, markers, and any decorative items you wish to use.
- Can I create 3D sculptures with cardboard? Absolutely! Cardboard is perfect for building 3D sculptures, and you can create anything from animals to abstract shapes.
- How can I encourage kids to be creative with their designs? Allow them to express their individuality, suggest themed sessions, and celebrate their work by hosting a mini art exhibit at home.

Paper Mache Projects
Engaging in is not just a fun way to spend time together as a family; it’s also a fantastic opportunity to enhance creativity and fine motor skills. This classic craft involves using strips of paper and a glue mixture to create a variety of imaginative sculptures and masks. The beauty of paper mache lies in its versatility—almost anything can be transformed into a work of art! Imagine turning a simple balloon into a colorful planet or crafting a whimsical mask for your next family gathering. The only limit is your imagination!
To get started, you’ll need a few basic materials, which are likely already in your home:
- Newspaper or any paper you can tear into strips
- Flour and water (for the glue mixture) or you can use white glue
- A balloon or a base object (like a bowl or a cardboard form)
- Paint and brushes for decorating
Once you have your materials ready, the magic begins! Start by creating your glue mixture. If you’re using flour, mix one part flour with two parts water until you achieve a smooth consistency. Dip the strips of paper into the glue, remove the excess, and layer them over your base object. It’s a messy but delightful process—don’t be surprised if laughter fills the room as everyone gets their hands sticky!
After layering several strips, let your creation dry completely. This might take a few hours or even overnight, depending on the thickness of your layers. Once dry, the real fun begins: decorating! Use vibrant paints, glitter, or even natural elements like leaves to give your project a unique flair. Encourage each family member to express their personality through their designs, making every piece a reflection of their creativity.
Here are a few project ideas to spark your imagination:
- Animal Masks: Create a series of animal masks for a fun family photoshoot.
- Decorative Bowls: Make colorful bowls that can be used for storing small items.
- Artistic Sculptures: Craft abstract shapes or figures that can be displayed around the house.
Not only does paper mache allow for creative expression, but it also fosters teamwork as family members collaborate on projects. You might find that the act of creating together strengthens your bond, as you share ideas, techniques, and laughter throughout the process. Plus, the sense of accomplishment when you see your finished piece is truly rewarding! So gather your supplies, unleash your creativity, and dive into the wonderful world of paper mache.
Q: What is the best type of paper to use for paper mache?
A: Newspaper is commonly used due to its availability and flexibility, but you can also use tissue paper, old magazines, or any paper that can be torn into strips.
Q: How long does it take for paper mache to dry?
A: Drying time can vary based on the thickness of the layers applied, but typically, it takes several hours to overnight for your project to dry completely.
Q: Can I use paint on wet paper mache?
A: It's best to wait until your paper mache is completely dry before painting to ensure that the colors come out vibrant and the structure remains intact.
Q: What are some other materials I can use for the glue mixture?
A: In addition to flour and water, you can use white glue mixed with water or even wallpaper paste for a stronger adhesive.
Now that you have all the information you need, gather your family and start creating some unforgettable paper mache masterpieces!

Nature-Inspired Crafts
Nature is a fantastic source of inspiration, and incorporating natural elements into your DIY crafts can lead to some truly magical creations. Imagine stepping outside, breathing in the fresh air, and gathering leaves, stones, or twigs to bring a piece of the outdoors into your home. Not only does this foster a connection with nature, but it also encourages family bonding as you explore, collect, and create together. Whether it’s a sunny day or a breezy afternoon, these nature-inspired crafts are perfect for igniting creativity and curiosity in family members of all ages.
One of the most delightful aspects of nature-inspired crafts is that they often require minimal supplies, making them both accessible and affordable. You can easily transform ordinary items into extraordinary works of art. For instance, think about the vibrant colors of autumn leaves or the unique shapes of stones that can be found in your backyard. These elements can be used in a variety of ways, from creating stunning artwork to crafting decorative pieces that brighten up your living space.
Have you ever considered using leaves as stamps? Leaf printing is a fantastic way to introduce children to the concept of nature-inspired design while also teaching them about color mixing. To get started, all you need are some leaves, paint, and paper. Simply coat the leaves with paint, press them onto the paper, and voila! You have a beautiful print that captures the essence of nature. This activity not only allows for artistic expression but also encourages children to observe the intricate details of leaves, such as their veins and shapes. It’s a wonderful way to combine art with a little bit of science!
Rock painting is another delightful craft that brings joy and creativity to family activities. Gather some smooth stones during your outdoor adventures, and let your imagination run wild! You can create vibrant designs, funny characters, or even inspirational messages. Once painted, these stones can serve as charming garden decorations or thoughtful gifts for friends and family. Plus, rock painting is an excellent way to practice fine motor skills, making it a win-win for both kids and adults. Just imagine a colorful pathway of painted rocks leading to your front door, welcoming guests with a smile!
These nature-inspired crafts not only enhance creativity but also provide a fantastic opportunity for families to engage with the environment. It’s a chance to step away from screens and immerse yourselves in the beauty of the outdoors. So, the next time you're looking for a fun and enriching activity, consider heading outside to gather some natural materials and let the crafting begin!
Q: What materials do I need for leaf printing?
A: For leaf printing, you will need leaves, paint (preferably non-toxic for kids), and paper. You might also want brushes for applying paint to the leaves.
Q: Can we use any type of rock for painting?
A: Yes! Smooth, flat rocks work best for painting, but you can use any rock you find. Just make sure to wash them to remove dirt before you start painting.
Q: Are these crafts suitable for all ages?
A: Absolutely! Both leaf printing and rock painting can be enjoyed by family members of all ages. Just adjust the complexity of the designs based on skill levels.
Q: How can we display our finished crafts?
A: You can display your leaf prints in frames or hang them on walls. Painted rocks can be placed in gardens, flower pots, or even used as paperweights indoors.

Leaf Printing
Leaf printing is not just a craft; it's a delightful way to connect with nature while unleashing your family's creativity. Imagine stepping outside, gathering vibrant leaves of various shapes and sizes, and transforming them into beautiful works of art! This activity is perfect for all ages, making it a fantastic bonding experience for families. Plus, it introduces children to the wonders of nature and the art of color mixing.
To get started, you'll need a few simple materials that you probably already have at home. Gather some leaves, non-toxic paints, a paintbrush, and paper or canvas. The beauty of leaf printing lies in its simplicity, allowing everyone to participate without feeling overwhelmed. Just think of each leaf as a unique stamp waiting to make its mark!
Here’s a quick step-by-step guide to help you dive into the world of leaf printing:
- Collect Leaves: Go on a little adventure in your backyard or a nearby park to collect different types of leaves. Look for interesting shapes and textures!
- Prepare Your Workspace: Lay down some newspaper or an old tablecloth to protect your surfaces. This will make cleanup a breeze.
- Apply Paint: Using a paintbrush, apply a thin layer of non-toxic paint to one side of the leaf. Be creative with colors!
- Press and Print: Carefully press the painted side of the leaf onto your paper or canvas. You can use your hands or a rolling pin to ensure even contact.
- Reveal the Art: Gently lift the leaf to reveal a stunning print. Each one will be unique, showcasing the intricate details of the leaf.
As you engage in this activity, encourage your family to experiment with different colors and layering techniques. You can even create a themed art piece by using leaves from specific trees or plants. This is not only a fun craft but also a fantastic way to learn about different types of foliage and their characteristics.
Once your leaf prints are dry, consider framing them or using them to create greeting cards for friends and family. This adds a personal touch to your gifts and showcases your family’s artistic flair. Imagine the joy of sharing your unique creations with loved ones, sparking conversations about your fun day spent crafting together!
Incorporating leaf printing into your family day in is a wonderful way to foster creativity, appreciation for nature, and togetherness. So, grab those leaves, roll up your sleeves, and let your family's imagination run wild!
Q: What types of leaves work best for printing?
A: Leaves with distinct shapes and veins, such as maple, oak, and ferns, are excellent choices for printing. Experiment with various types to see which ones create the best prints!
Q: Can we use any type of paint for leaf printing?
A: It's best to use non-toxic paints, especially if children are involved. Acrylic paints work well, but you can also use tempera or watercolors for a softer effect.
Q: How do we clean up after leaf printing?
A: Simply wash your brushes and any tools used with soap and water. If paint has dried on surfaces, a little warm water and scrubbing should do the trick.
Q: Can we use leaf prints for other projects?
A: Absolutely! Leaf prints can be used to create greeting cards, bookmarks, or even wall art. The possibilities are endless!

Rock Painting
Rock painting is not just a craft; it's an invitation to creativity that brings families together in a splash of colors and laughter. Imagine gathering your family in the backyard, surrounded by nature, with a collection of smooth stones waiting to be transformed into vibrant masterpieces. This simple yet engaging activity allows everyone, from toddlers to grandparents, to express their artistic talents while creating something beautiful that can adorn your garden or home.
To get started, all you need are a few basic supplies: some clean, smooth rocks, acrylic paints, brushes, and a sealant to protect your artwork. You can find rocks in your garden or at a local park, making this not only a fun craft but also a great excuse to get outside and explore. The process of painting rocks is as easy as it is enjoyable. First, gather your materials and set up a workspace, perhaps on a picnic table or a large blanket spread out on the grass. This way, everyone can join in without feeling cramped.
Once you have your rocks and paints ready, let your imagination run wild! You might want to start with simple designs, like polka dots or stripes, before moving on to more intricate patterns such as animals, flowers, or even inspirational quotes. Each family member can choose their own theme or design, which promotes individuality while still fostering a sense of togetherness. Why not make it a friendly competition? Set a timer and see who can come up with the most creative rock design in just 30 minutes! This adds an element of fun and excitement to the activity.
After painting, allow the rocks to dry completely. Once dry, you can apply a sealant to protect your artwork from the elements, especially if you plan to display them outdoors. This step is crucial; it ensures that your creations remain vibrant and beautiful for a long time. You can even have a little ceremony where everyone showcases their finished rocks, sharing the inspiration behind their designs. This moment of sharing not only enhances family bonding but also boosts everyone's confidence and appreciation for each other's creativity.
To inspire your rock painting adventure, here are some popular themes you might consider:
- Nature: Paint flowers, trees, or animals to celebrate the beauty of the outdoors.
- Inspirational Quotes: Write uplifting messages that can brighten someone's day.
- Seasonal Designs: Create rocks that reflect the current season, like snowflakes for winter or sunflowers for summer.
Rock painting is not just about the end product; it’s about the memories you create along the way. Each stroke of the brush becomes a moment shared, a story told, and a memory made. So, gather your family, unleash your creativity, and let the rocks tell your story!
Q: What type of paint should I use for rock painting?
A: Acrylic paint is recommended as it adheres well to rocks and provides vibrant colors. Make sure to use a sealant afterward to protect your artwork.
Q: Can I use any type of rock?
A: Yes! Smooth, flat rocks are ideal for painting, but you can use any shape or size that inspires you.
Q: How do I clean the rocks before painting?
A: Simply rinse them with water to remove dirt and debris. Allow them to dry completely before you start painting.
Q: How can I display my painted rocks?
A: You can place them in your garden, on your porch, or even inside your home as decorative pieces. They also make great gifts!

Seasonal Crafts
When it comes to family bonding, are a fantastic way to celebrate the time of year while unleashing creativity. Each season brings its own unique colors, textures, and themes, allowing families to create decorations that reflect the beauty of nature and the spirit of the holidays. Imagine gathering around the table, scissors in hand, laughter filling the air as you transform simple materials into cherished memories. Seasonal crafts not only enhance your home’s decor but also provide an opportunity for family members to express their artistic flair and work together towards a common goal.
For instance, during the fall, you might find yourselves collecting vibrant leaves and acorns, ready to create stunning decorations that showcase the rich hues of autumn. Winter brings the joy of crafting ornaments and wreaths, while spring is perfect for floral designs that celebrate new beginnings. Summer, on the other hand, invites you to embrace the outdoors, crafting items that reflect the warmth and vibrancy of the season. By engaging in these activities, families foster a sense of togetherness and create lasting memories that can be cherished for years to come.
Here are a couple of craft ideas you can try:
- Holiday Decorations: Get creative by making homemade decorations for various holidays. Whether it’s colorful Easter eggs, spooky Halloween masks, or festive Christmas ornaments, these projects encourage everyone to participate in the festive preparations. You can use materials like paper, fabric, or even natural elements like pinecones and twigs to add a personal touch to your decorations.
- Seasonal Wreaths: Crafting seasonal wreaths is another engaging activity that can beautify your home. You can use natural materials like dried flowers, leaves, or even artificial items like ribbons and ornaments. These wreaths not only enhance your home decor but also provide a hands-on project that brings the family together. Imagine hanging a beautiful wreath on your front door, welcoming guests with a handmade touch!
In addition to these ideas, consider hosting a seasonal craft party where each family member can showcase their creations. This not only allows for creativity to flourish but also encourages a sense of pride in what each person has made. You can even set up a small exhibition at home, displaying everyone’s crafts and inviting friends and neighbors to admire your family’s artistic endeavors.
As you dive into the world of seasonal crafts, remember that the process is just as important as the final product. The laughter, conversations, and shared experiences during these crafting sessions are what truly make them special. So gather your supplies, embrace the spirit of the season, and let your creativity shine!
Q: What materials do I need for seasonal crafts?
A: You can use a variety of materials including paper, cardboard, fabric, natural elements like leaves and flowers, and even recyclables. The key is to be creative and use what you have at home!
Q: How can I involve younger children in crafting?
A: Choose simple projects that require minimal tools and supervision. Activities like painting rocks or making paper decorations are great for younger children. Always ensure safety by using child-friendly materials.
Q: Can I incorporate educational elements into seasonal crafts?
A: Absolutely! You can use seasonal crafts to teach children about colors, shapes, and even the significance of different holidays. For example, while making a Thanksgiving wreath, you can discuss the history of the holiday.

Holiday Decorations
When it comes to celebrating holidays, nothing beats the warmth and joy that homemade decorations bring to your home. Imagine the delight on your family's faces as you gather around the table, crafting unique pieces that reflect your personal style and the spirit of the season. Whether it's the twinkling lights of Christmas, the vibrant colors of Halloween, or the fresh blooms of spring, creating your own holiday decorations can be a fun and rewarding experience.
To kick off your holiday crafting adventure, consider using materials you already have at home. From old newspapers to scrap fabric, the possibilities are endless! For instance, you can transform simple items into stunning decorations. Here are a few ideas to spark your creativity:
- Paper Snowflakes: A classic winter project that kids love! Just fold and cut paper into intricate designs, then hang them in your windows for a magical winter wonderland effect.
- Handmade Ornaments: Use clear plastic or glass ornaments, and fill them with glitter, dried flowers, or even family photos. These personalized touches make each ornament special and memorable.
- Thanksgiving Centerpieces: Gather pinecones, leaves, and acorns from your backyard to create a beautiful centerpiece for your Thanksgiving table. A touch of gold spray paint can add elegance to your natural elements.
As you dive into these projects, remember that the process is just as important as the end result. Encourage everyone in the family to share their ideas and contribute to the decorations. This not only fosters creativity but also strengthens family bonds. Plus, it’s a great way to reminisce about past holidays and share stories, making the crafting session even more meaningful.
Once your decorations are complete, don't forget to display them proudly! Hang your paper snowflakes in the windows, adorn your tree with homemade ornaments, and set your Thanksgiving centerpiece on the dining table. Each piece will serve as a reminder of the time spent together, creating lasting memories that you can cherish for years to come.
Finally, consider involving your children in the planning process. Ask them what themes or colors they want to incorporate into your holiday decorations. This not only makes them feel included but also encourages them to express their creativity. Who knows? Their wild ideas might just lead to the most unique and delightful decorations you’ve ever created!
Q: What materials can we use for holiday decorations?
A: You can use a variety of materials such as paper, fabric, natural elements like leaves and pinecones, and even recyclable items like bottles and boxes. The key is to get creative with what you have!
Q: How can we make our decorations eco-friendly?
A: Opt for natural materials, repurpose items you already own, and avoid single-use plastics. You can also use biodegradable options like paper or fabric instead of synthetic materials.
Q: What are some easy holiday decoration ideas for kids?
A: Simple crafts like paper snowflakes, painted rocks, or hand-drawn banners are great for kids. They can also help in creating ornaments or decorating wrapping paper for gifts!

Seasonal Wreaths
Creating is a delightful way to bring the essence of each season into your home. These handcrafted decorations not only enhance your living space but also provide a wonderful opportunity for family bonding. Imagine gathering around the table, surrounded by colorful materials, laughter, and creativity as you work together to design a unique wreath that reflects the beauty of the changing seasons. Whether it’s the vibrant colors of autumn leaves, the fresh blooms of spring, or the cozy vibes of winter, each wreath tells a story.
To get started, you’ll need some basic supplies. Here’s a quick overview of what you might consider:
| Season | Materials | Crafting Ideas |
|---|---|---|
| Spring | Floral wire, faux flowers, ribbons | Floral wreath with pastel colors |
| Summer | Shells, twine, greenery | Beach-themed wreath with shells and starfish |
| Autumn | Leaves, pine cones, burlap | Rustic wreath with autumn leaves and pine cones |
| Winter | Evergreen branches, ornaments, ribbons | Festive wreath with ornaments and winter greenery |
As you gather your materials, consider involving each family member in the process. Assign roles based on interests—some can handle the cutting and shaping, while others can focus on decorating and assembling. This not only makes the crafting process more fun but also allows everyone to contribute their unique touch. For instance, kids can paint wooden ornaments or create paper snowflakes to add to the wreath, making it a true family masterpiece.
Once the wreath is complete, hang it on your front door or display it in your living room. Each time you pass by, you’ll be reminded of the fun you had creating it together. Plus, seasonal wreaths make for great conversation starters when guests come over. They can admire your creativity and even ask about the crafting process, giving you a chance to share your family experience.
In addition to the aesthetic appeal, crafting seasonal wreaths has educational benefits as well. It encourages fine motor skills, promotes teamwork, and nurtures creativity. As you explore different materials and techniques, you’ll also get to teach your children about seasonal changes and the significance of each season in nature. It’s a win-win situation!
So, gather your supplies, roll up your sleeves, and let your creativity flow. The joy of crafting seasonal wreaths together will not only beautify your home but also create cherished memories that your family will treasure for years to come.
Q: What materials do I need to make a seasonal wreath?
A: The materials can vary by season, but generally, you’ll need a base (like a foam or wire wreath), decorative elements (like flowers, leaves, or ornaments), and tools (like scissors and glue).
Q: How long does it take to make a wreath?
A: The time can vary depending on the complexity of the wreath, but you can expect to spend anywhere from 1 to 3 hours crafting.
Q: Can I use natural materials?
A: Absolutely! Using natural materials can add a beautiful, rustic touch to your wreath. Just be sure to dry them properly to prevent decay.
Q: How do I store my wreaths after the season?
A: Store your wreaths in a cool, dry place. You can hang them or place them in a box with tissue paper to protect them from damage.
Frequently Asked Questions
- What are some easy DIY craft ideas for a family day in?
There are plenty of easy DIY craft ideas you can explore! From creative paper crafts like origami and greeting cards to fun projects using recyclables like cardboard sculptures or paper mache, the options are endless. You can also engage in nature-inspired crafts like leaf printing or rock painting. The key is to use materials you already have at home and let your imagination run wild!
- How can we make crafts using recyclable materials?
Transforming recyclable materials into crafts is a fantastic way to promote sustainability! Gather items like cardboard boxes, plastic bottles, and old newspapers. You can create cardboard creations like playhouses or sculptures, or use paper mache techniques to craft masks and figures. Not only does it help the environment, but it also sparks creativity in your family!
- What supplies do we need for paper mache projects?
For paper mache projects, you'll need some basic supplies: strips of newspaper or old paper, a mixture of flour and water (or glue and water), and a form to build upon, like a balloon or a cardboard structure. You can also use paint and decorations to finish your creations. It's a fun way to build fine motor skills while creating something unique!
- Can you suggest some nature-inspired crafts?
Absolutely! Nature-inspired crafts can be a delightful way to connect with the outdoors. Try leaf printing by applying paint to leaves and pressing them onto paper for beautiful designs. Rock painting is another fun option—collect some smooth stones and use acrylic paints to create colorful garden decorations. These crafts not only encourage creativity but also foster a love for nature!
- What are some ideas for seasonal crafts?
Seasonal crafts can add a festive touch to your home! Consider making holiday decorations like handmade ornaments or garlands for Christmas, or spooky decorations for Halloween. You can also create seasonal wreaths using natural materials like twigs and dried flowers or artificial ones. These projects are great for family bonding and enhance your home decor!